
从0入门自主空中机器人-4-【PX4与Gazebo入门】

从0入门自主空中机器人-4-【PX4与Gazebo入门】
MGodmonkey前言: 从上一篇的文章 从0入门自主空中机器人-3-【环境与常用软件安装】 | MGodmonkeyの世界 中我们的机载电脑已经安装了系统和常用的软件,这一篇文章中我们入门一下无人机常用的开源飞控PX4,以及ROS中无人机的仿真
1. PX4的安装
1.1 PX4固件代码的下载与编译
注:推荐使用已经配置好的PX4固件包,PX4版本==1.12:https://pan.quark.cn/s/9964d20e6c40 提取码:g3ij
通过github下载PX4代码(下载慢时可以找一些github的镜像网站)
1 | git clone https://github.com/PX4/PX4-Autopilot.git --recursive |
- 安装必要的依赖
1 | sudo apt-get install protobuf-compiler libeigen3-dev libopencv-dev -y |
如果安装PX4的环境比较纯净,比如说刚装的Ubuntu系统,运行bash脚本过程中会报好几次错!因为他需要安装的依赖包比较多。解决方法其实也很简单,即 【确定导致报错的依赖包名,网上检索安装这个依赖包的方法】。我们只需要将导致报错的依赖包都安装好了,运行.sh文件时就能会跳过他们。
在安装过程中确认并通过所有的提示,即出现以下提示,完成后重新启动计算机。
1 | Relogin or reboot computer before attempting to build NuttX targets |
如果在下载或编译过程中遇到任何问题都可以参考下面的博客:
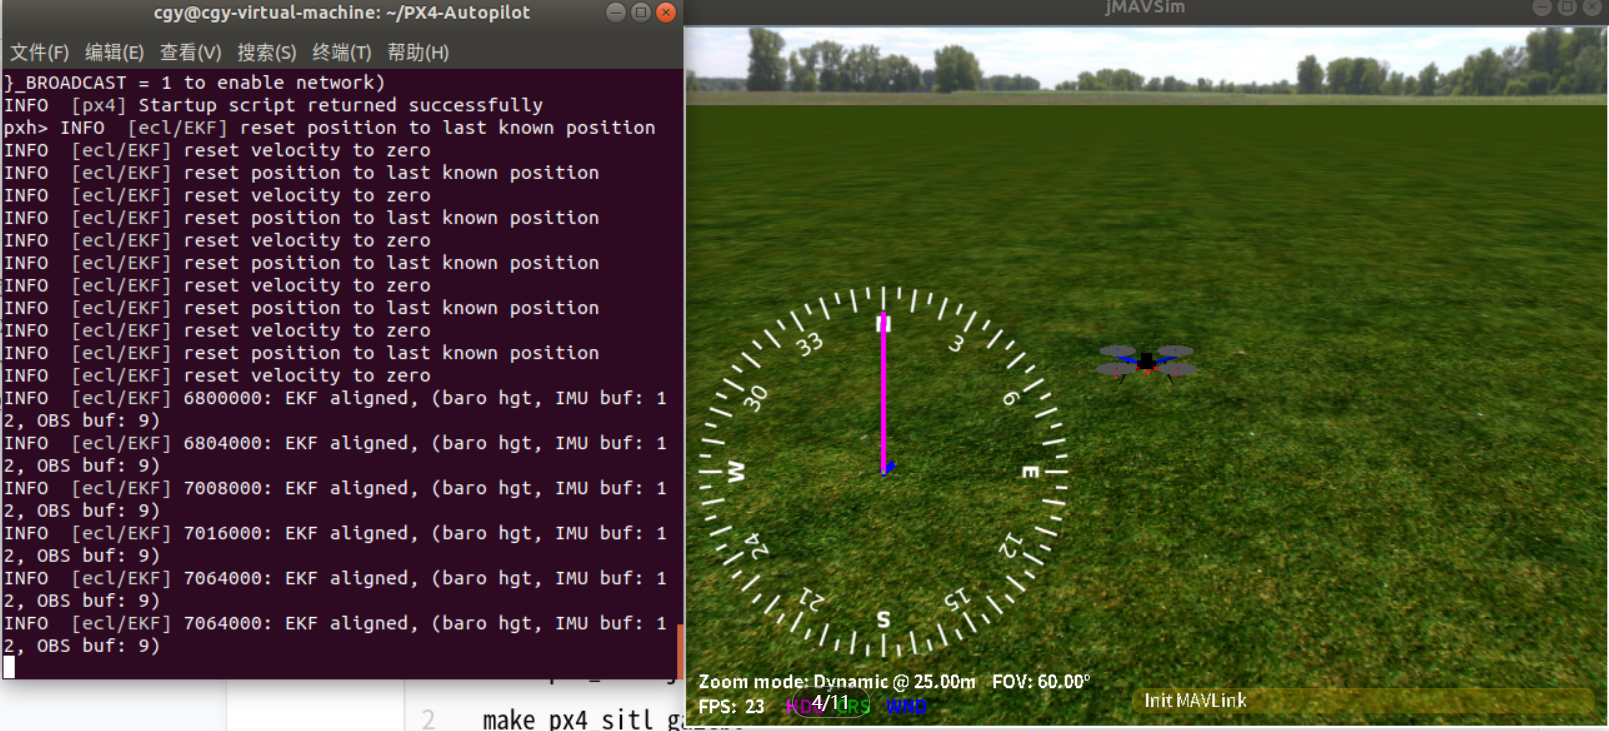
- jmavsim仿真环境编译
1 | cd PX4-Autopilot |
编译结束会自动启动仿真,出现一下画面则说明编译正常
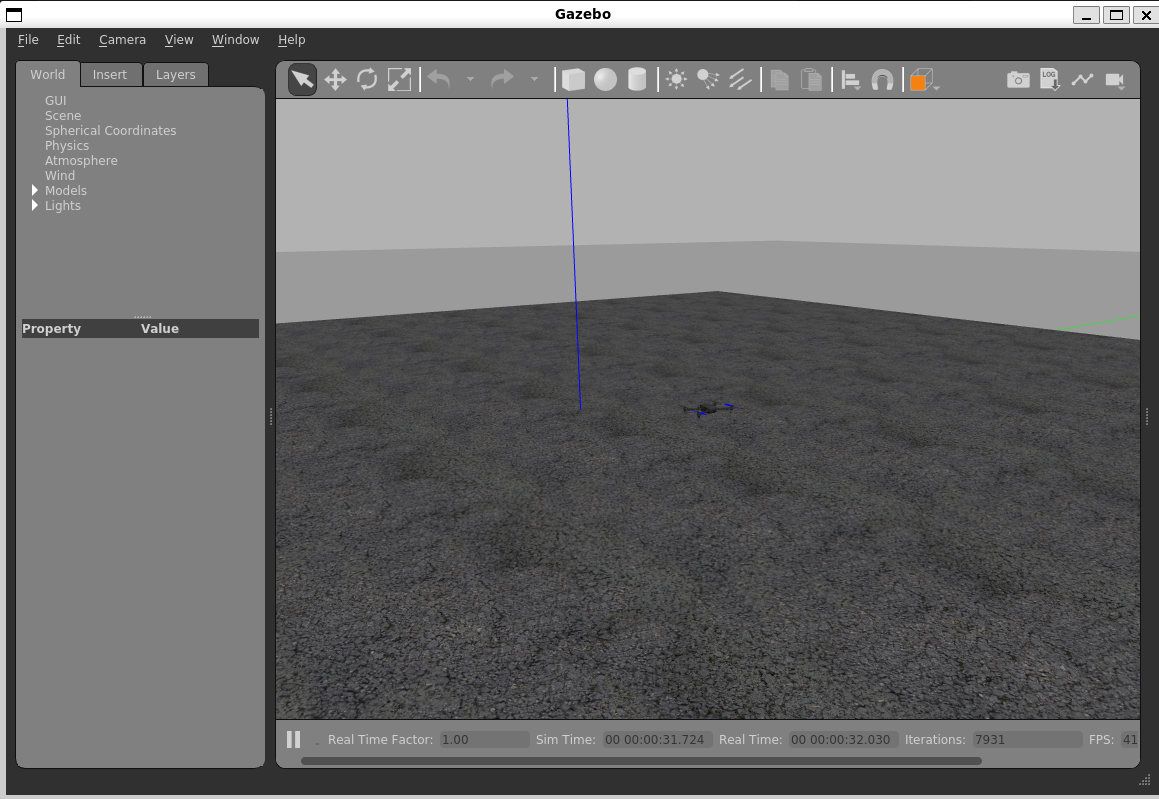
- gazebo仿真编译
1 | make px4_sitl gazebo |
出现gazebo界面代表成功
2. Gazebo仿真
仿真一般用于验证算法,比较吃性能,机载电脑上运行仿真帧率会比较低,因此仿真推荐在性能比较好的电脑上运行,推荐使用WSL2或者虚拟机
- 向
~/.bashrc中添加launch启动路径
1 | ## 文件夹的路径或有出入,以自己的为准进行修改 |
添加成功后执行source ~/.bashrc来生效脚本
- 测试
可以通过下面这几条命令来测试
1 | # 运行结果和 make px4_sitl gazebo一样 |
3. QGC地面站
- 安装QGC地面站,可以在下面的网址下载
https://docs.qgroundcontrol.com/master/en/qgc-user-guide/getting_started/download_and_install.html
- 安装依赖
1 | sudo usermod -a -G dialout $USER |
注销并再次登录以启用对用户权限的更改
- 选择 Appimage格式下载:下载地址
- 添加权限并启动
1 | chmod +x ./QGroundControl.AppImage |
4. MOVROS的基本使用
使用MOVROS来实现PX4飞控无人机的自主启动、悬停和定点飞行
- 创建工作空间以及功能包
1 | mkdir -p ~/catkin_ws/src |
- 创建文件
offboard/src/offb_node.cpp并添加下面的代码
1 | /** |
代码解释或者python版本见:MAVROS Offboard 控制示例 (C++) | PX4 自动驾驶用户指南
- 修改CMakeLists.txt,添加如下两行
1 | add_executable(offboard src/offb_node.cpp) |
- 编译
1 | cd ~/catkin_ws |
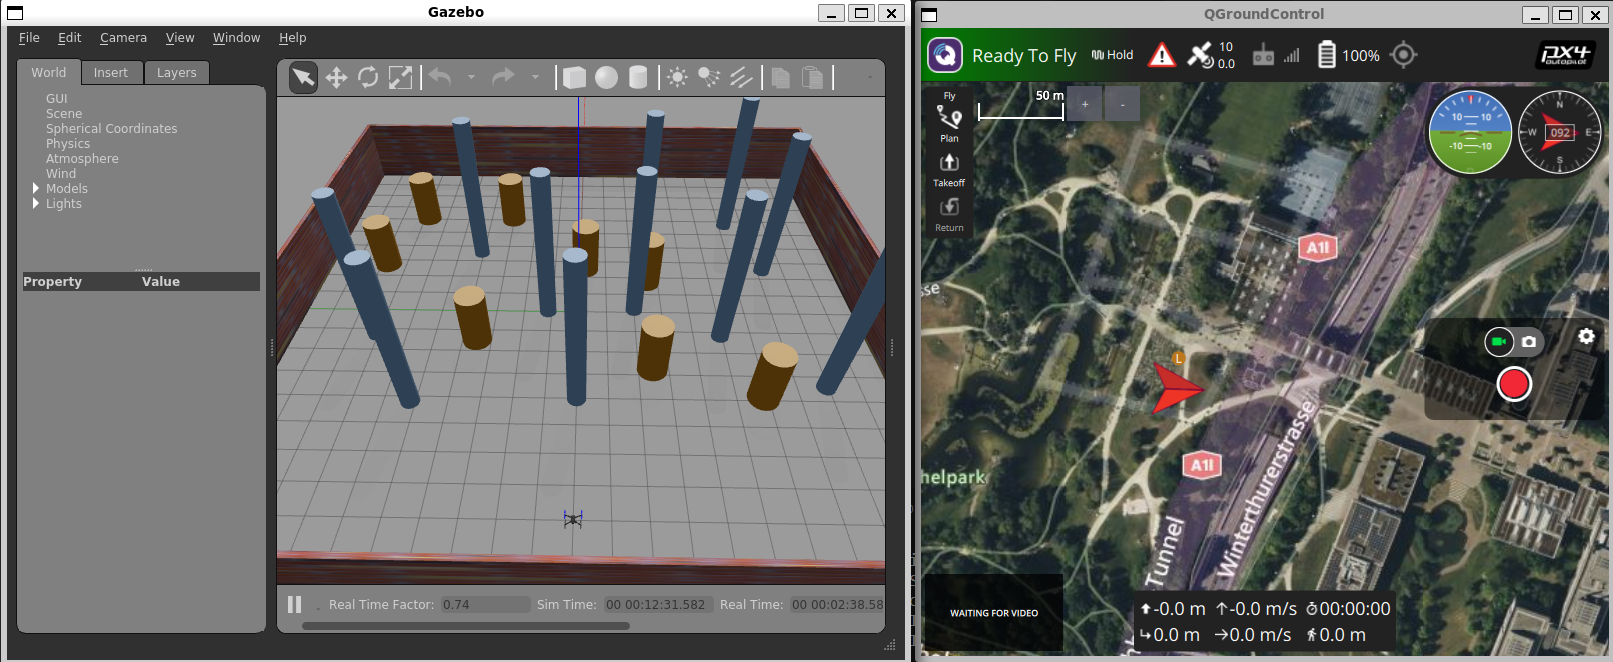
- 启动无人机仿真并运行节点
在一个终端中运行下面指令
1 | roslaunch px4 fast_test.launch # 启动仿真 |
在另一个终端中启动节点
1 | rosrun offboard offboard |
更多mavros的使用以及内置的消息、服务等使用详见官方文档:mavros - ROS Wiki
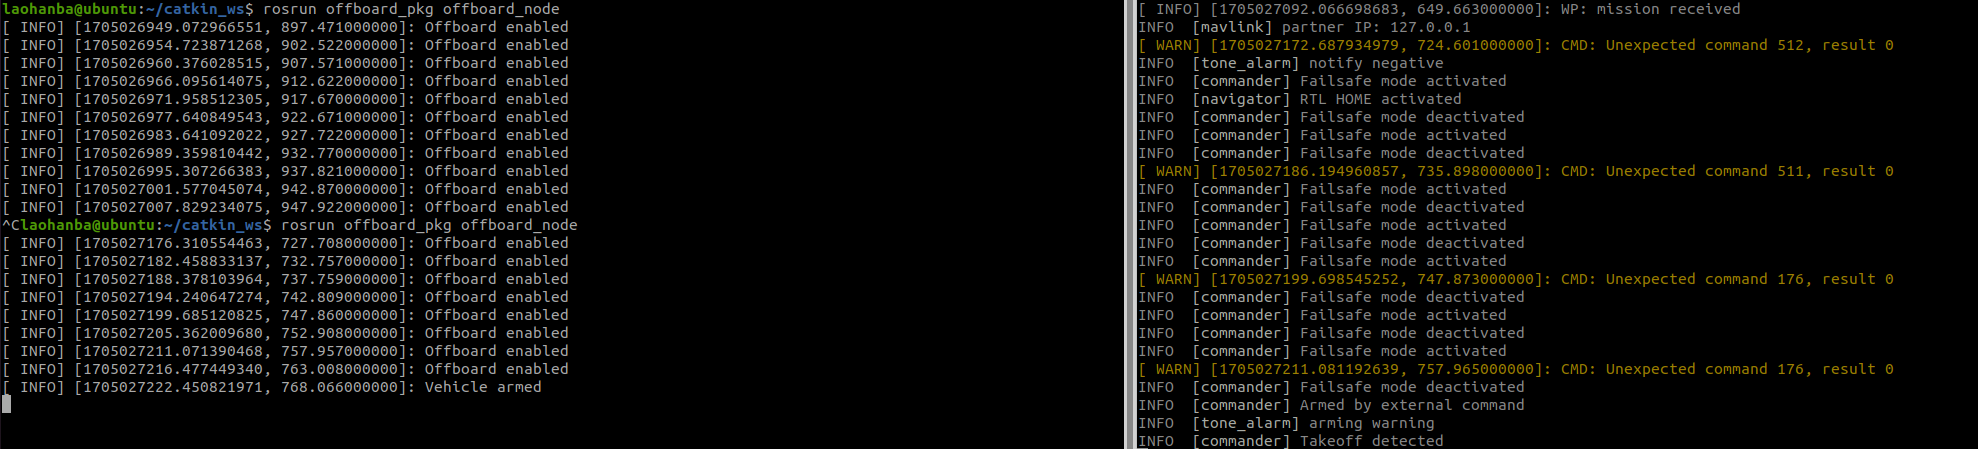
注:gazebo仿真时可能遇到的问题
- 无人无法控制时的BUG
gazebo仿真终端显示如下并不断重复
2
3
INFO [commander] Failsafe mode deactivated
INFO [commander] Failsafe mode activated且offboard节点端口不断出现如下
解决办法:
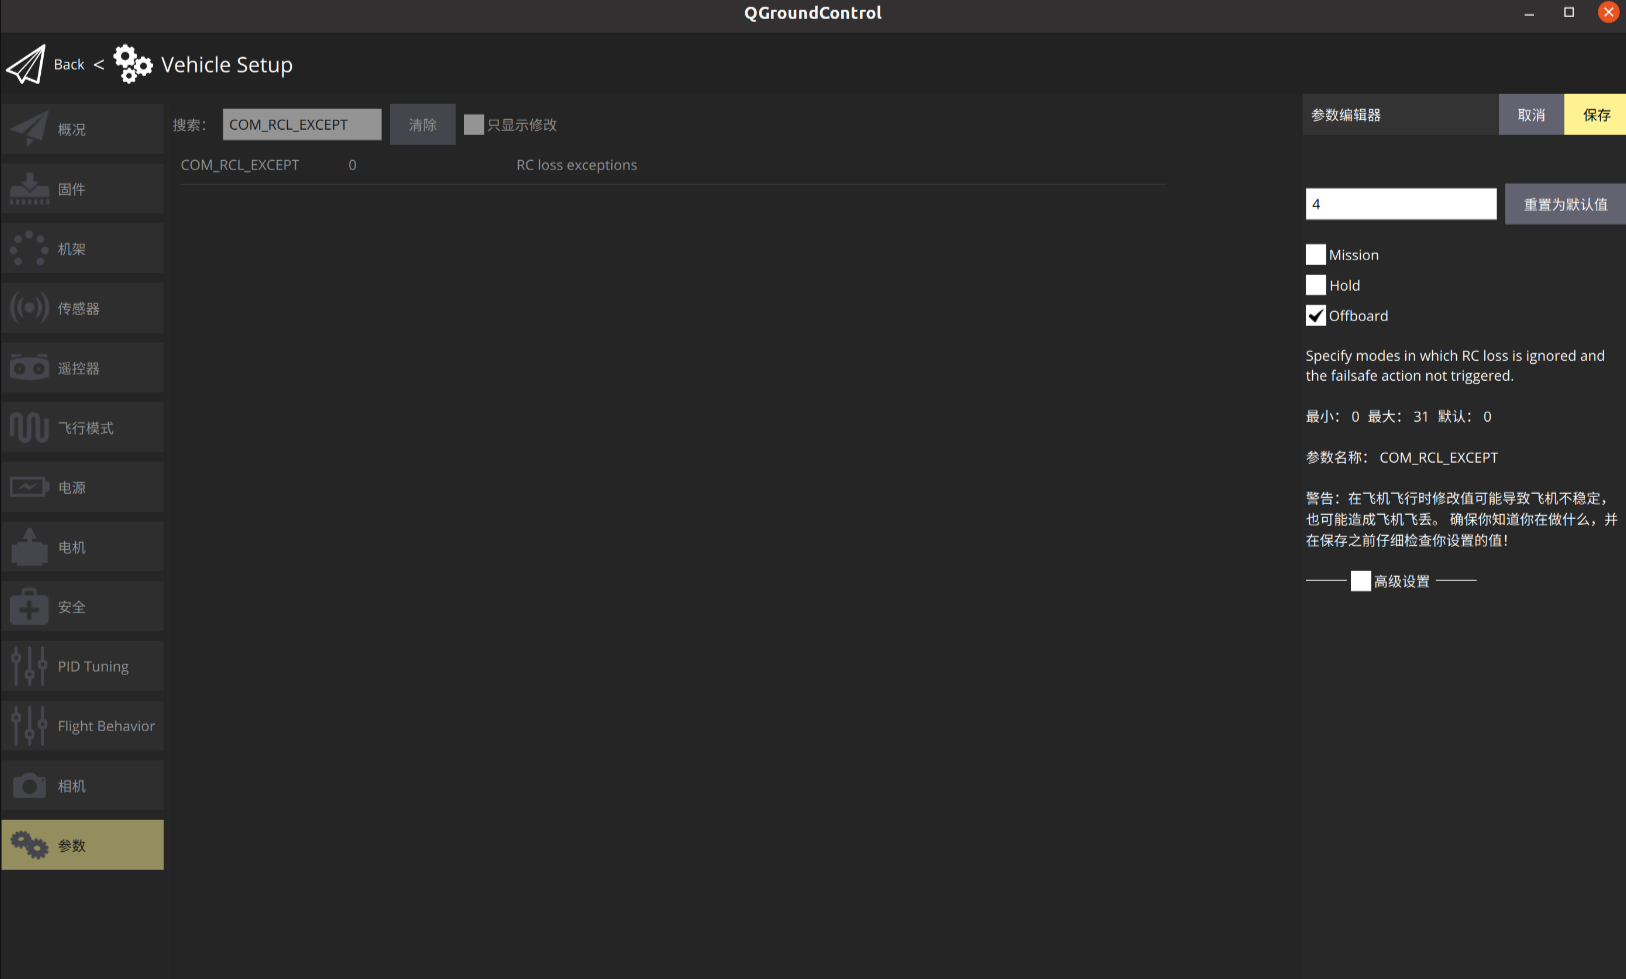
在前面的三个终端运行的时候,打开QGC地面站,在参数中搜索
COM_RCL_EXCEPT将
COM_RCL_EXCEPT参数改为4并保存参考博客:
【PX4-AutoPilot教程-Offboard】MAVROS功能包控制无人机进入offboard模式飞行官方例程(C++实现)_mavros px4 实例-CSDN博客
- 启动single_vehicle_spawn_ssdf.launch时报错
2
Invalid <param> tag: Cannot load command parameter [model_description]: no such command [['xmlstarlet', 'ed', '-d', '//plugin[@name="mavlink_interface"]/mavlink_tcp_port', '-s', '//plugin[@name="mavlink_interface"]', '-t', 'elem', '-n', 'mavlink_tcp_port', '-v', '4560', '/home/laohanba/PX4-Autopilot/Tools/sitl_gazebo/models/iris_D435i/iris_D435i.sdf']].
参考:


